How to Fix Shaky Hands in Photography: A Complete Guide
May 22, 2026 • César Daniel Barreto
Blurry photos from camera shake are one of the most frustrating problems in photography, and one of the most fixable. Whether you’re shooting in low light, using a telephoto lens, or simply have naturally unsteady hands, this guide walks through every technique that actually works: body mechanics, camera settings, environmental support, and the gear that can take the problem off your shoulders entirely.
1. Proper Grip & Body Position
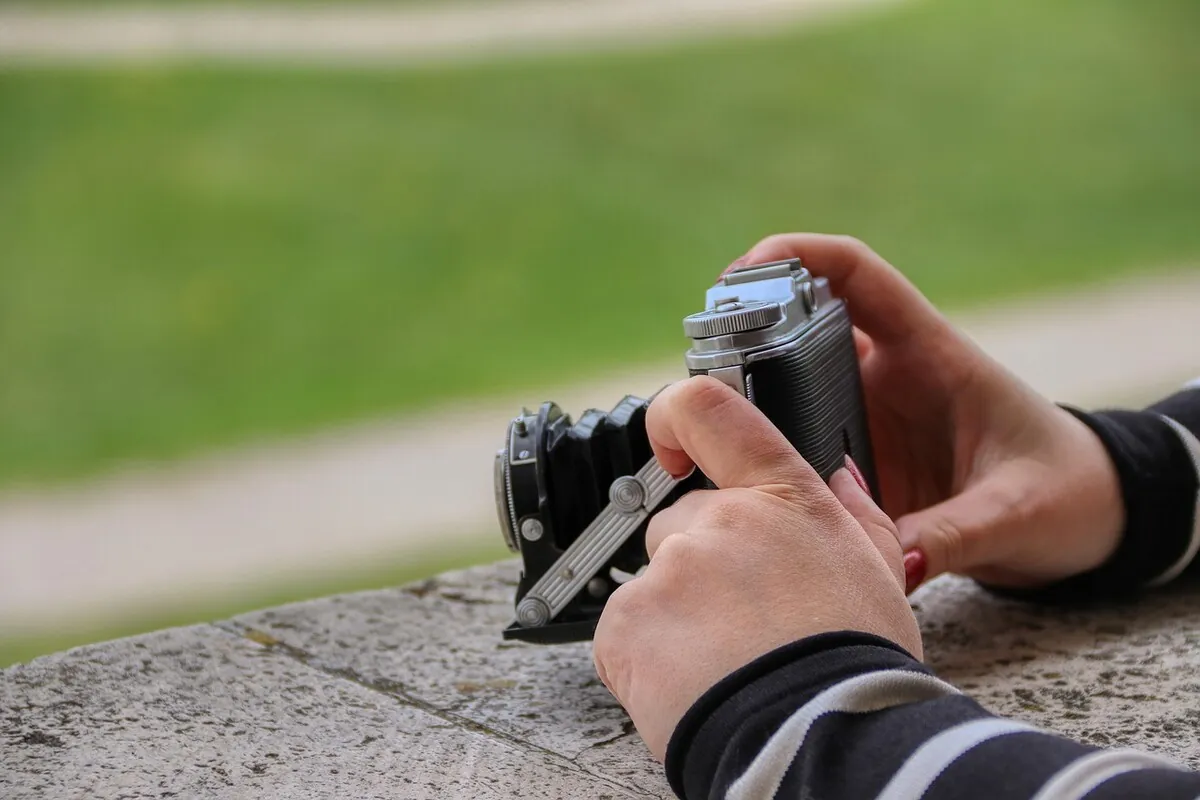
How you physically hold the camera is the single biggest factor in reducing shake. Most beginners hold a camera the way they hold a smartphone, gripping both sides with the screen out in front. That posture is almost guaranteed to produce blurry shots. Here’s what to do instead.
Right hand on the grip with the index finger lightly resting on the shutter. Left hand supports the lens from below, never from the sides.
Tuck your elbows in tight so your arms become part of your core. Stand with feet shoulder-width apart, one slightly forward, knees soft.
2. Breathing & Timing
Even with a perfect grip, your breathing will move the camera. Your chest rises and falls, and so do your hands. The fix is timing, not holding your breath, but pressing the shutter at the calmest moment of the breath cycle.
Exhale slowly and press the shutter at the bottom of the breath. Don’t hold your breath completely, that introduces tremor.
Squeeze, don’t jab. The shutter button should feel like applying gentle pressure to a stress ball, not stabbing a doorbell. A sudden jab dips the whole front of the camera right at the moment the sensor is exposing.
3. Camera Settings That Help
The body technique gets you most of the way; settings cover the rest.
The 1/focal-length rule
The classic minimum shutter speed for handheld shooting is 1 / focal length (full-frame equivalent). At 50mm you need at least 1/50s. At 200mm you need 1/200s. At 500mm, 1/500s. For extra safety, or if you know your hands are shakier than average, double it: 1/100s for that 50mm lens, 1/400s for the 200mm.
Other settings that buy you a faster shutter
- Raise ISO. A higher ISO lets the sensor work faster, which lets you use a quicker shutter. Modern cameras handle ISO 1600–6400 cleanly, and noise can be corrected in post, camera shake cannot.
- Open the aperture. A wider aperture (smaller f-number, like f/2.8 or f/1.8) lets in more light, allowing a faster shutter at the same exposure.
- Burst mode. Muscle tremor is roughly sinusoidal, it oscillates. Shooting 3–5 frames in a burst means at least one will land at a steadier moment of the cycle. Pick the sharpest in post.
- Use the viewfinder, not the screen. Pressing the camera against your face creates a third point of contact. Shooting at arm’s length on a screen leaves the camera floating in mid-air.
4. The Three-Point Contact Rule
Stability comes from contact points. The more places your body touches the camera (and the more places your body touches something solid), the steadier the shot.
5. Image Stabilization (OIS, IBIS, VR)
Modern lenses and camera bodies include stabilization systems that physically counteract your shake in real time, either by moving glass elements inside the lens (optical) or by shifting the sensor itself (in-body). Each manufacturer brands theirs differently:
| Brand | Lens stabilization | In-body stabilization |
|---|---|---|
| Canon | IS (Image Stabilizer) | IBIS (R-series mirrorless) |
| Nikon | VR (Vibration Reduction) | IBIS (Z-series mirrorless) |
| Sony | OSS (Optical SteadyShot) | IBIS (most α bodies) |
| Fujifilm | OIS | IBIS (X-H, X-T4+, X-S) |
| Pentax | — | SR (Shake Reduction) |
| Panasonic / Olympus / OM | OIS / Power OIS | IBIS (5-axis) |
Stabilization typically buys you 3 to 7 stops of extra shutter latitude, meaning you can shoot a 200mm lens at 1/15s instead of 1/200s and still get sharp results. Turn it on for handheld work. Turn it off when the camera is locked to a tripod, since some older systems hunt for movement that isn’t there and introduce blur.
6. Find Physical Support
Your environment is a free stabilizer. The world is full of solid objects you can press against, lean on, or rest the camera on. Use them.
Stability ranked, worst to best (handheld)
- Arm’s length, screen out front, worst case, almost guaranteed shake.
- Viewfinder + proper grip, solid baseline.
- Viewfinder + back against a wall, adds a body anchor.
- Viewfinder + elbows on a railing or table, turns your forearms into a tripod.
- Strap pulled taut, the camera, your neck, and both hands form a tensioned triangle.
- Lying flat, lens on the ground, most stable handheld position that exists.
7. Gear Solutions
When technique isn’t enough, long exposures, telephoto wildlife, video, the right tool removes shake entirely or dramatically reduces it.
| Tool | Best for | Stabilization gain | Typical cost |
|---|---|---|---|
| Tripod | Landscapes, long exposures, interiors, astrophotography | Maximum, eliminates shake entirely | $80–$600 |
| Monopod | Sports, wildlife, run-and-gun shooting | ~2 stops of stabilization | $40–$200 |
| Gimbal (3-axis) | Video, moving subjects, vlogging | Electronic counter-motion, smooth pans | $150–$900 |
| Bean bag / pod | Wildlife from a car or low angle | Functional tripod replacement | $15–$40 |
| Cable / remote shutter | Tripod work where finger-press still shakes the rig | Removes shutter-press shake | $10–$80 |
| Wider lens | Everyday handheld shooting | Reduces magnified shake at source | varies |
8. Lens Choice Matters
This one is counter-intuitive but important: longer lenses magnify shake along with the image. A tiny hand wobble at 24mm is invisible. The same wobble at 400mm looks like an earthquake.
The practical takeaway: if a scene allows it, walk closer instead of zooming in. A wider lens used from closer range is more forgiving of small hand movements than the same composition shot from far away with a telephoto.
Putting It All Together
You don’t need every technique on this page for every shot, you stack them based on the situation:
- Bright daylight, 35mm lens: Good grip, viewfinder, 1/125s. Done.
- Low-light café interior: Grip + elbows on the table + breathe-out + ISO 3200 + open aperture + IBIS.
- Telephoto wildlife at dusk: Monopod + IS on + 1/500s + burst mode + brace against a tree.
- Long-exposure landscape: Tripod + IS off + 2-second self-timer or cable release.
The biggest improvement most people can make costs nothing: change how you hold the camera. Get the grip right, tuck your elbows, exhale, and squeeze. Everything else is an upgrade on top of that foundation.
César Daniel Barreto
César Daniel Barreto is an esteemed cybersecurity writer and expert, known for his in-depth knowledge and ability to simplify complex cyber security topics. With extensive experience in network security and data protection, he regularly contributes insightful articles and analysis on the latest cybersecurity trends, educating both professionals and the public.