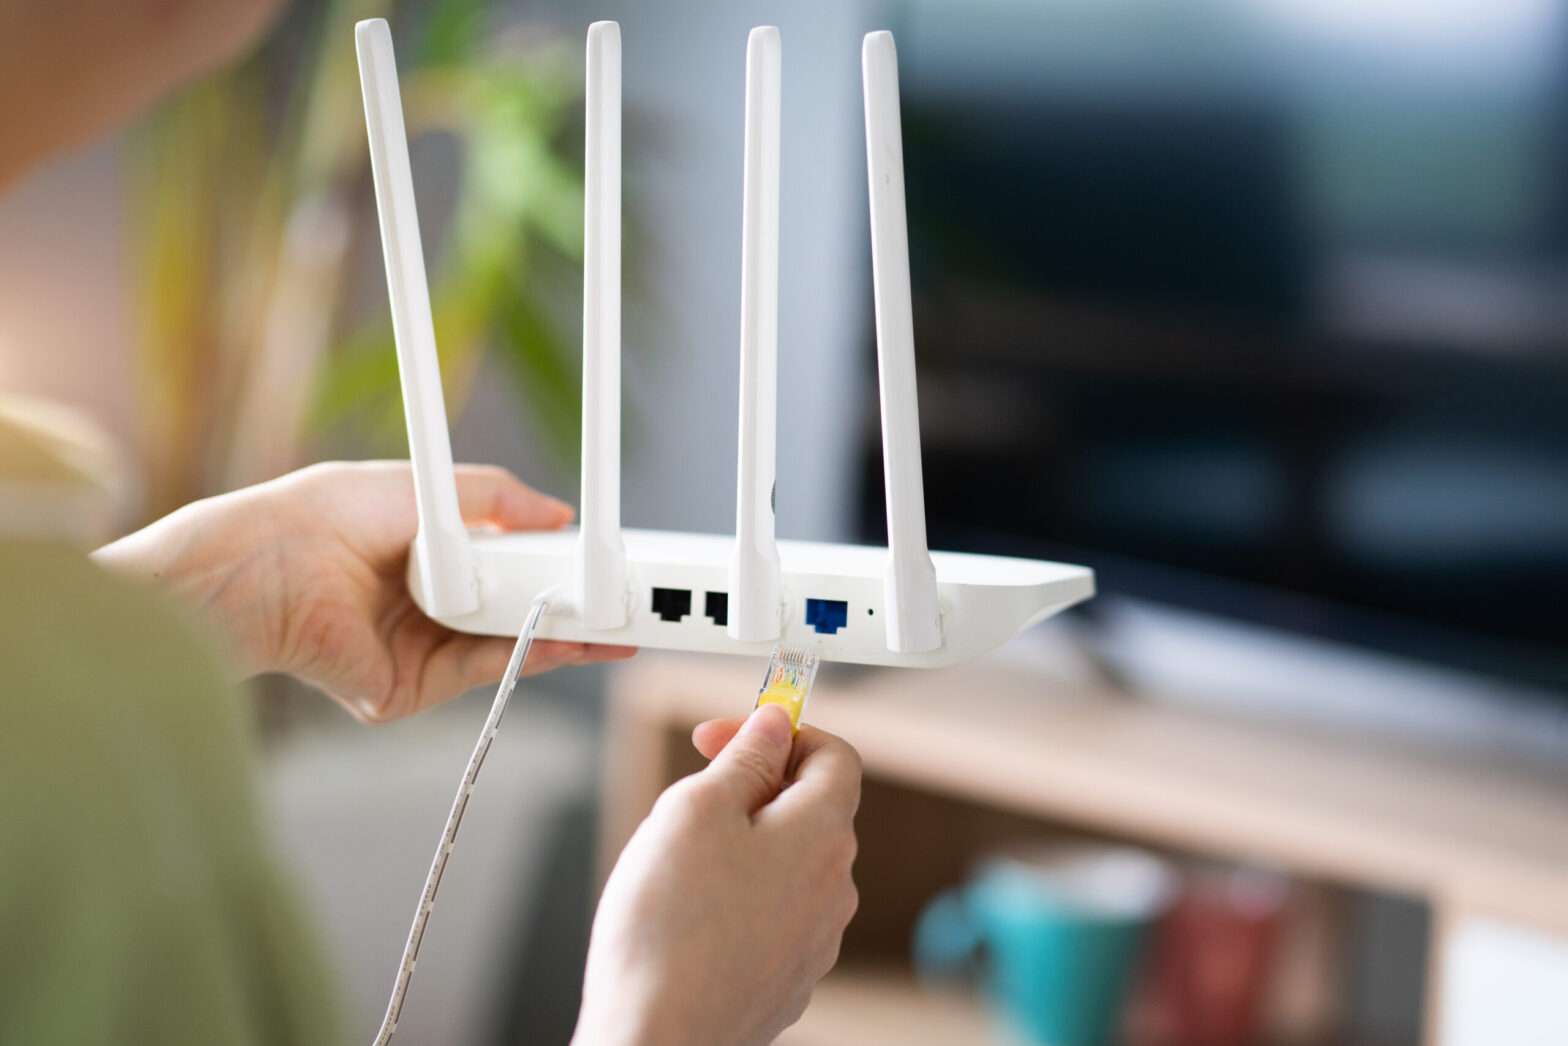
What you should know when installing Home Wireless Routers (Wi-Fi)
December 15, 2022 • César Daniel Barreto
One commonality that stands out when discussing Cisco network routers and switches: is the renowned Internetwork Operating System (IOS). This powerful “engine” is what powers all of these devices, ensuring their successful operation. This article will primarily center on iOS and analyze how to manipulate it. Before that occurs, though, I’d like you to be aware of the two distinct approaches used when operating with iOS: either through a Command Line Interface (CLI) or Graphical User Interface (GUI).
The Command Line Interface (CLI) is a sophisticated method of configuring IOS devices. Utilizing the CLI, we can enter precise commands that will cause the desired behavior to occur. Therefore, we will have complete control and access to our Routers or Switches.
The GUI (Graphical User Interface) offers a much more user-friendly approach for managing devices like these. Frequently, we rely on it when establishing small network gadgets such as Home Wireless Routers (Wi-Fi). This section will delve into how users can access Cisco IOS (versions 15.2 or 12.4) through the Command Line Interface for efficient operation.
Introduction to the CLI
Basic Router Configurations
Now it’s time to dive into the exciting bits of this article and begin with a Cisco Router setup. Moreover, we will utilise a network simulator to establish our network environment.
To ensure that our Cisco Router is up and running, here are some critical settings we’ll configure:
- Hostname: the name of the device.
- Passwords: securely encrypted or communicated in an open, unencrypted format.
- IP addresses: within the interfaces.
Remote access: easily administer your network devices through secure Telnet or SSH connections.
a) User Access Levels In Cisco IOS
They have developed three access levels with distinct activities available for each user for security reasons.
- Verify your connection to the internet by running commands such as ping or traceroute. (>)
- Get an inside look into what’s actually happening with the device. (#)
- To make any changes. (config)#
Upon connecting to a Cisco device like a Router, Switch, or Firewall, you will be granted user exec mode (>) – the primary access level. With this user exec access level, you can only perform basic commands such as ping and traceroute.
To access a greater set of commands and privileges, it’s essential to enter the following command: Router>enable. This will allow you to ascend the ladder and upgrade your level of control.
We have reached the second access level: privilege mode – R1#. Here you can observe every action taken with the equipment (through various show commands), yet you cannot make any changes.
Router>enableRouter#To create alterations to the device, we would have to advance our access level up an additional notch – reaching a commanding level known as global configuration mode. This exalted status provides us with greater capabilities and privileges than before.
Router#configure terminalRouter(config)#By accessing the Cisco device’s global configuration mode, you can make any desired alterations with complete control – akin to having Windows Administrator or root user access on Linux.
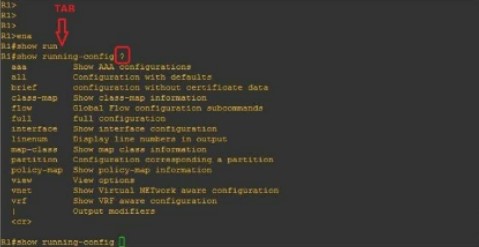
To ensure you’re prepared for any challenge, here are a few commands that I highly suggest familiarizing yourself with: If you want to save time and typing effort while still ensuring accuracy, we’ve got the perfect solution for composing longer commands.
When you type “R1#show run” and hit the TAB key, it will autocomplete your command. Furthermore, if you enter a question mark (?), any subsequent commands will be displayed on-screen.
b) Selecting a device name (Hostname)
To alter the name of a Router or Switch, all you have to do is enter this command: (you will see it in the next image)
Router(config)#hostname ROUTER_NAMEROUTER_NAME(config)#c) Securing access to the Router
To protect your Router against unauthorized access, let’s look into how we can set up a password in privilege mode (#). Follow this straightforward process to complete the task:
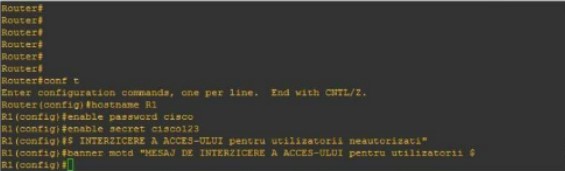
Router(config)#hostname R1R1(config)#enable password cisco orR1(config)#enable secret cisco123Utilizing this command will set a warning banner for anyone attempting to access the device, alerting them of potential consequences.
R1(config)#banner motd "UNAUTHORISED ACCESS DENIED"If your query is regarding the distinctions between an “enable password”, and a “secret enable,” you’ve come to the right place. Here’s what sets them apart:
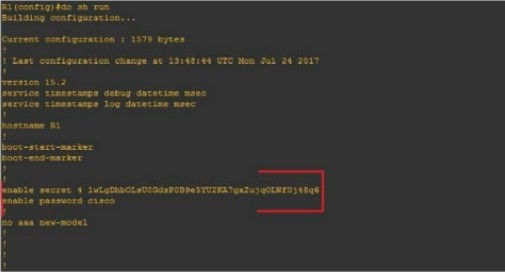
One configuration (#enable secret) is encoded while the other (#enable password) remains unencrypted.
Let’s begin by configuring the Router for network access (reachability) using the following topology:
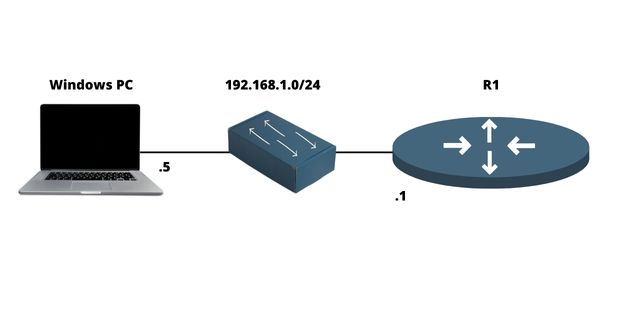
d) Configuring an IP address on the Router
A Router is an invaluable tool that allows us to interconnect multiple networks seamlessly through various ports, typically two or three. We refer to a port as the physical space in which a cable can be connected. As for its corresponding logical side, we identify it as an interface.
To recapitulate:
- Port = Physical
- Interface = Logical
For example, we will configure an IP (logical) address on the interface and physically connect it to a port via cable.
For any communication to take place within the network, these interfaces require an IP address and must be enabled, meaning turn ON. As illustrated in the figure, you can easily configure an IP address on a network interface:
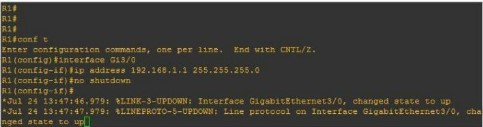
R1(config)#interface FastEthernet0/0R1(config-if)#ip address 192.168.1.1 255.255.255.0R1(config-if)#no shutdownf) Configuring remote access on a Router (Telnet, SSH)
Telnet
Network applications provide secure remote connections to networks, devices (such as routers and switches), or servers. This ensures reliable access from any location.
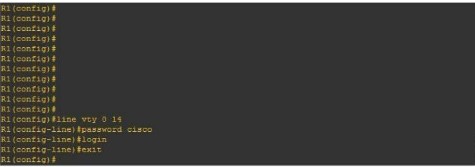
R1(config)#line vty 0 14R1(config-line)#password ciscoR1(config-line)#loginTo get started, we’ll need to enter our virtual lines (a total of 15), set the password (“Cisco”), and then initiate the Telnet process #login.
SSH
To safely connect to a local area network or Internet device remotely, SSH is the ideal protocol. To configure this on Cisco machines, it’s necessary to take certain steps:
- Establishing a personal login and password.
- Establishing a Domain name
- To ensure maximum safety, generating public and private key combinations is essential.
- To enable the virtual lines (vty) process, use the command #login local.
In the figure below, you can see an example of the SSH configuration on a Cisco Router:
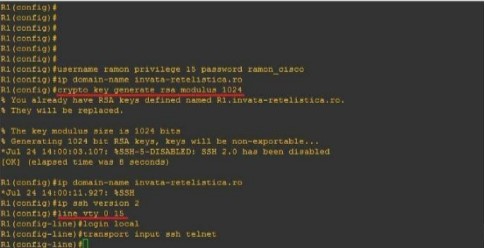
R1(config)#username admin privilege 15 password admincisco321R1(config)#ip domain-name my.home.labR1(config)#crypto key generate rsa modulus 1024R1(config)#ip ssh version 2R1(config)line vty 0 15R1(config-line)#login localR1(config-line)#transport input ssh telnetTo sum up
The Router is an essential device in any computer network because it interconnects multiple networks together. It has different networking protocols enabled (like RIP and OSPF) that assist him with the interconnection process. It also offers many different configurations for security purposes (like passwords on Virtual lines). In this article, we’ve learned how to set up an IP address on the Router, as well as for remote access (Telnet & SSH). We’ve also learned about some of the most important configurations a network administrator should know.

César Daniel Barreto
César Daniel Barreto is an esteemed cybersecurity writer and expert, known for his in-depth knowledge and ability to simplify complex cyber security topics. With extensive experience in network security and data protection, he regularly contributes insightful articles and analysis on the latest cybersecurity trends, educating both professionals and the public.