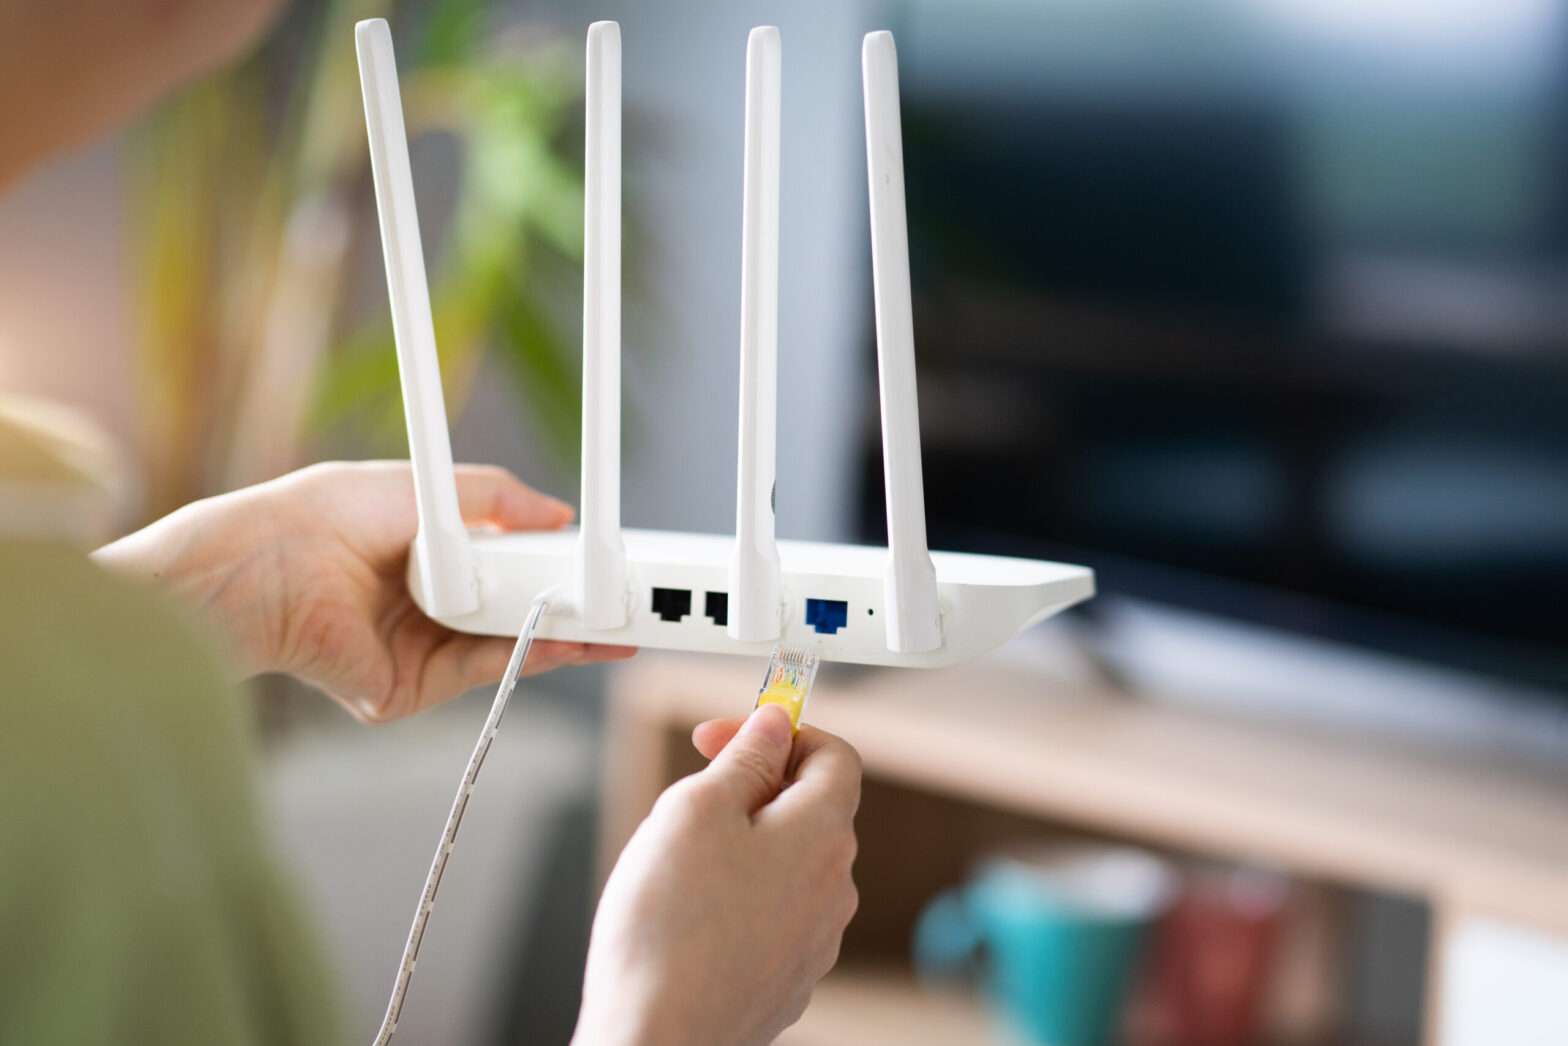
Cosa si deve sapere quando si installano router wireless domestici (Wi-Fi)
15 dicembre 2022 • César Daniel Barreto
One commonality that stands out when discussing Cisco network routers and switches: is the renowned Internetwork Operating System (IOS). This powerful “engine” is what powers all of these devices, ensuring their successful operation. This article will primarily center on iOS and analyze how to manipulate it. Before that occurs, though, I’d like you to be aware of the two distinct approaches used when operating with iOS: either through a Command Line Interface (CLI) or Graphical User Interface (GUI).
L'interfaccia a riga di comando (CLI) è un metodo sofisticato per configurare i dispositivi IOS. Utilizzando la CLI, possiamo inserire comandi precisi che faranno sì che si verifichi il comportamento desiderato. Pertanto, avremo il controllo completo e l'accesso ai nostri Router o Switch.
L'interfaccia grafica utente (GUI) offre un approccio molto più user-friendly per gestire dispositivi come questi. Spesso ci affidiamo ad essa quando stabiliamo piccoli dispositivi di rete come i Router Wireless Domestici (Wi-Fi). Questa sezione esplorerà come gli utenti possono accedere a Cisco IOS (versioni 15.2 o 12.4) tramite l'interfaccia a riga di comando per un'operazione efficiente.
Introduzione alla CLI
Configurazioni di base del Router
Now it’s time to dive into the exciting bits of this article and begin with a Cisco Router setup. Moreover, we will utilutilizzare un simulatore di rete per stabilire il nostro ambiente di rete.
To ensure that our Cisco Router is up and running, here are some critical settings we’ll configure:
- Nome host: il nome del dispositivo.
- Password: crittografate in modo sicuro o comunicate in un formato aperto e non crittografato.
- Indirizzi IP: all'interno delle interfacce.
Accesso remoto: amministrare facilmente i tuoi dispositivi di rete tramite connessioni Telnet o SSH sicure.
a) Livelli di accesso utente in Cisco IOS
Hanno sviluppato tre livelli di accesso con attività distinte disponibili per ciascun utente per motivi di sicurezza.
- Verifica la tua connessione a Internet eseguendo comandi come ping o traceroute. (>)
- Get an inside look into what’s actually happening with the device. (#)
- Per apportare modifiche. (config)#
Una volta connesso a un dispositivo Cisco come un Router, Switch o Firewall, ti verrà concesso l'accesso utente modalità exec (>) – the primary access level. With this user exec access level, you can only perform basic commands such as ping and traceroute.
To access a greater set of commands and privileges, it’s essential to enter the following command: Router>enable. This will allow you to ascend the ladder and upgrade your level of control.
Abbiamo raggiunto il secondo livello di accesso: modalità privilegio – R1#. Here you can observe every action taken with the equipment (through various show commands), yet you cannot make any changes.
Router>abilitaRouter#To create alterations to the device, we would have to advance our access level up an additional notch – reaching a commanding level known as modalità di configurazione globale. Questo status esaltato ci fornisce capacità e privilegi maggiori rispetto a prima.
Router#configura terminaleRouter(config)#By accessing the Cisco device’s global configuration mode, you can make any desired alterations with complete control – akin to having Windows Administrator or root user access on Linux.
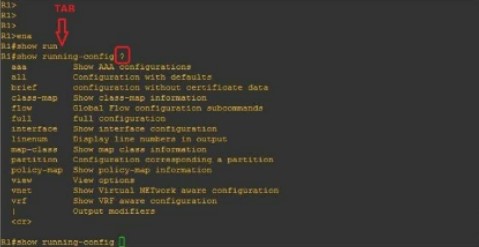
To ensure you’re prepared for any challenge, here are a few commands that I highly suggest familiarizing yourself with: If you want to save time and typing effort while still ensuring accuracy, we’ve got the perfect solution for composing longer commands.
When you type “R1#show run” and hit the TAB key, it will autocomplete your command. Furthermore, if you enter a question mark (?), any subsequent commands will be displayed on-screen.
b) Selezionare un nome dispositivo (Nome host)
Per modificare il nome di un Router o Switch, tutto ciò che devi fare è inserire questo comando: (lo vedrai nell'immagine successiva)
Router(config)#nome host ROUTER_NAMEROUTER_NOME(config)#c) Proteggere l'accesso al Router
To protect your Router against unauthorized access, let’s look into how we can set up a password in privilege mode (#). Follow this straightforward process to complete the task:
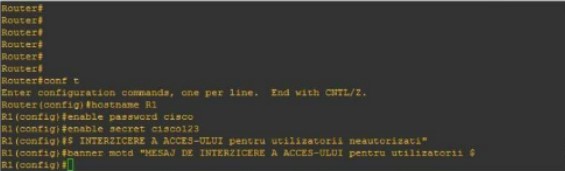
Router(config)#nome host R1R1(config)#enable password cisco oR1(config)#abilita segreto cisco123Utilizzando questo comando verrà impostato un banner di avviso per chiunque tenti di accedere al dispositivo, avvisandoli delle potenziali conseguenze.
R1(config)#banner motd "ACCESSO NON AUTORIZZATO NEGATO"If your query is regarding the distinctions between an “enable password”, and a “secret enable,” you’ve come to the right place. Here’s what sets them apart:
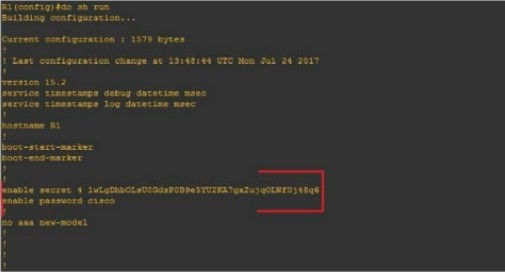
Una configurazione (#enable secret) è codificata mentre l'altra (#enable password) rimane non crittografata.
Let’s begin by configuring the Router for network access (reachability) using the following topology:
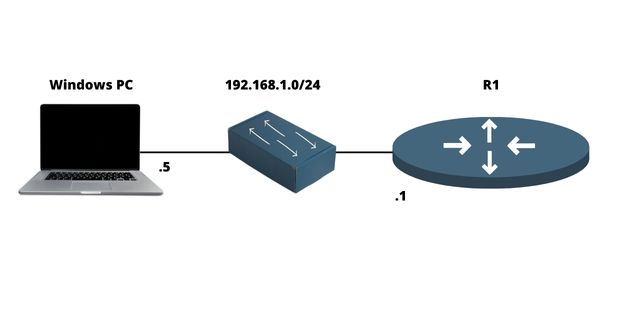
d) Configurare un indirizzo IP sul Router
Un Router è uno strumento inestimabile che ci consente di interconnettere più reti senza problemi tramite varie porte, tipicamente due o tre. Ci riferiamo a una porta come lo spazio fisico in cui un cavo può essere collegato. Per quanto riguarda il suo lato logico corrispondente, lo identifichiamo come un'interfaccia.
Per ricapitolare:
- Porta = Fisico
- Interfaccia = Logico
Ad esempio, configureremo un indirizzo IP (logico) sull'interfaccia e lo collegheremo fisicamente a una porta tramite cavo.
Affinché qualsiasi comunicazione avvenga all'interno della rete, queste interfacce richiedono un indirizzo IP e devono essere abilitate, cioè accese. Come illustrato nella figura, puoi facilmente configurare un indirizzo IP su un'interfaccia di rete:
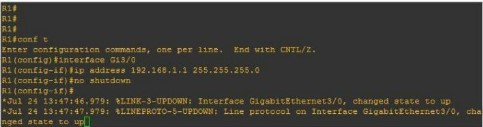
R1(config)#interfaccia FastEthernet0/0R1(config-if)#ip indirizzo 192.168.1.1 255.255.255.0R1(config-if)#no spegnimentof) Configurare l'accesso remoto su un Router (Telnet, SSH)
Telnet
Le applicazioni di rete forniscono connessioni remote sicure a reti, dispositivi (come router e switch) o server. Questo assicura un accesso affidabile da qualsiasi posizione.
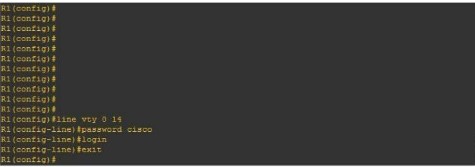
R1(config)#linea vty 0 14R1(config-line)#password ciscoR1(config-line)#accessoTo get started, we’ll need to enter our virtual lines (a total of 15), set the password (“Cisco”), and then initiate the Telnet process #login.
SSH
To safely connect to a local area network or Internet device remotely, SSH is the ideal protocol. To configure this on Cisco machines, it’s necessary to take certain steps:
- Stabilire un login e una password personali.
- Stabilire un nome di dominio
- Per garantire la massima sicurezza, è essenziale generare combinazioni di chiavi pubbliche e private.
- Per abilitare il processo delle linee virtuali (vty), utilizzare il comando #login local.
Nella figura sotto, puoi vedere un esempio della configurazione SSH su un Router Cisco:
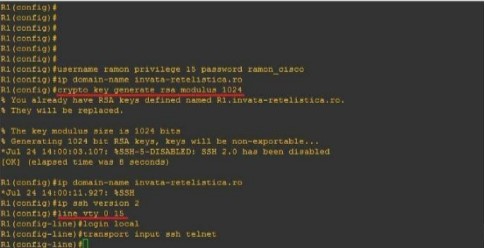
R1(config)#nome utente admin privilegio 15 password admincisco321R1(config)#ip nome-dominio my.home.labR1(config)#crypto chiave genera rsa modulo 1024R1(config)#ip ssh versione 2R1(config)linea vty 0 15R1(config-line)#login localeR1(config-line)#trasporto input ssh telnetPer riassumere
Il Router è essenziale device in any computer network because it interconnects multiple networks together. It has different networking protocols enabled (like RIP and OSPF) that assist him with the interconnection process. It also offers many different configurations for security purposes (like passwords on Virtual lines). In this article, we’ve learned how to set up an IP address on the Router, as well as for remote access (Telnet & SSH). We’ve also learned about some of the most important configurations un amministratore di rete dovrebbe sapere.

Cesare Daniele Barreto
César Daniel Barreto è uno stimato scrittore ed esperto di cybersecurity, noto per la sua approfondita conoscenza e per la capacità di semplificare argomenti complessi di sicurezza informatica. Con una vasta esperienza nel campo della sicurezza delle reti e della protezione dei dati, contribuisce regolarmente con articoli e analisi approfondite sulle ultime tendenze in materia di tendenze della cybersecurity, educando sia i professionisti che il pubblico.